
It's officially my favorite time of the year! Crisp apples, cool evenings, cozy sweaters, colorful leaves, and absolutely everything smells like pumpkin and cinnamon. Love it. Love it. LOVE it! I've been feeling like my house could use a bit of harvest cheer lately, so I whipped up some pumpkin chocolate chip bread to get that yummy fall flavor in the air, and then I went out to the garden to pick some darling little pumpkins.
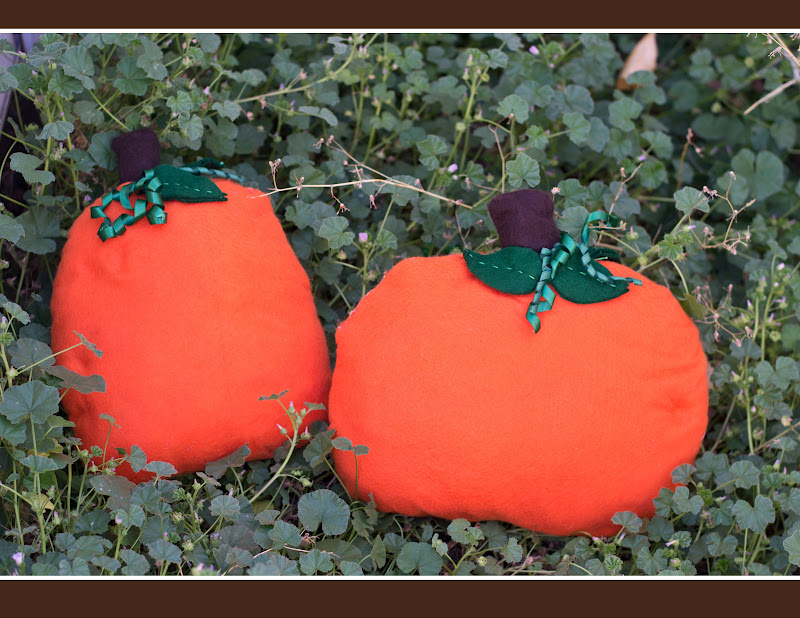
Except they're not real pumpkins, they're pillows. And they didn't grow in the garden. I don't have a garden... I don't even have a yard.
But still they're cute right?
But wait, there is more to these pumpkins than meets the eye...
NOW how cute are they!?


Ah! So fun!
"So, what are they?" you ask?
Well, it's like what you would get if Mr. Potato Head and a Pumpkin had a baby... or maybe Mr. Potato Head and a Pillow Pet... Either way... the Pumpkin Pillow Pal was born!

I've had so much fun playing with watching my kids play with these little pumpkin pals! We love switching up their faces and coming up with new combinations. My kids especially love the mustache. I mean seriously, who doesn't love a good mustache?

These funny little pillows have provided the kids with hours of entertainment, which as we all know, means happy kids AND a happy mom!

Now I'm sure you're thinking "Jamie, those little pieces would be lost in 5 minutes at my house." And you're right. But have no fear- I have a solution for you! Let's turn these little guys over and check out their backsides.

They were a little hesitant to let me take this picture. They've put on a little bit of holiday weight lately with all the yummy fall baking we've been doing over here and everything... but I digress.
These handy dandy pockets make a great place to store all those little pieces, and because everything is made of felt- and felt sticks to felt- I haven't had a problem with them falling out. (P.S. PLEASE ignore the white thread. It's awful. Stop looking at it. I'm so embarrassed. I didn't have any orange thread. The little bits of time I carve out for myself to work on a project are very sacred, and very very rare.... I didn't want to waste any precious time going to the store so I just used what I had. If you decide to make one of these pillows and the white thread bugs you- use orange okay?)
They were pretty darn simple to make as well. The truth is I am incredibly challenged when it comes to using a sewing machine, yet I somehow managed to get through this project (with the help of my favorite craft tool- my glue gun.) Trust me, if I can do it, YOU can too! In fact I'm sure yours would turn out much better. :)
So please don't judge my non-seamstress ways as I walk you through this tutorial.
MATERIALS
Sheets of Felt- you'll need brown, green, black, and yellow.
Orange felt by the yard. Decide how big you want your pillows to be and buy enough fabric to make it happen. Mine are about 12 x 16. You'll need enough material to make a matching front and back, as well as a pocket.
Polyfill
Ribbon and embroidery thread- optional
INSTRUCTIONS
(I apologize that there are no step by step pictures, but it's pretty self explanatory)
1. Using a pencil, draw your pumpkin shape on the orange felt. Cut out three of these shapes.
2. Cut the top 1/3 off of one of the shapes- this will become your pocket.
3. Fold over the top of your pocket piece and hem it. (Use matching thread to avoid looking like an amateur like me.)
4. Lay your pocket piece on top of one of the larger pieces.
5. Lay the other piece on top of that and pin almost all the way around. Leave an opening at the top where you'll stick the stem. You'll need enough room for your hand to fit through.
6. Sew where you've pinned and turn it right side out.
7. Stuff with polyfill
8. Make yourself a little rectangular pillow out of brown felt.
9. Stick the stem in the opening and ... (here's where you seamstresses are going to die. Remember this is a judge free zone. LoL.) hot glue the opening shut around the stem. It doesn't matter if it doesn't look perfect because you're going to cover it with cute leaves.
10. Cut out some cute leaf shapes. I made mine two layers thick and then stitched a line down the middle with embroidery thread just because I had some laying around.
11. Whip out that hot glue gun again and glue your leaves around the stem, strategically hiding any mistakes you may have made while gluing the stem in. :)
12. I happened to have a little bit of curly ribbon left over from a hairbow I was making, so I figured why not throw that on there as well?
And there you have it! Your pumpkins are done!
Now comes the fun part! All you have to do is cut out some random shapes using your black felt to use for the eyes, nose and mouth. (I glued the yellow irises onto the eyes, and the yellow teeth into the mouths... I didn't want there to be TOO many pieces.) Get creative! Think outside the box! If you're anything like me you'll find yourself up late designing more and more fun faces, and sooner or later you'll feel like a kid again. And then you just might remember that being a kid is LOTS of fun!

Happy Crafting!

LOVE. Love, love, love. The pumpkins, but you especially. You crack me up. And I LOOOOVE the green curly ribbon for the vines.
ReplyDeleteYou are officially as awesome as I've always thought you were.
<3
Very cool!
ReplyDelete