Showing posts with label Silhouette. Show all posts

Monday, April 28, 2014

Many Thanks Card


Supplies used:
American Crafts' Margarita Rumba Paper
Pick Your Plum Ribbon

Fonts:
Sacramento ("many")
Epidemia ("Thanks")

If anyone wants the Silhouette cut file, you may download it here.

 photo Heart-Adriane_zps2e2b06dc.jpg


post signature

Monday, April 21, 2014

Go Bananas Popup Card

Hey there!  Looking for the BLAYZERS GIVEAWAY?!?  Don't forget to enter to win your very own pair of Blayzers Inferno workout pants!!


I kept the outside of the card really simple, because I wanted it to contrast starkly with the inside:


Boom!  Hello adorable monkey!  I love that he pops up on a spiral, so he bounces back and forth when you open the card.

Supplies Used:
Miss Kate Cuttables

Fonts:
SectionIntersection ("Go")
SAF ("Bananas")--I changed it a little bit though.
Traveling Typewriter (Card Front)

I designed the spiral, the bananas, the tree trunks and coconuts.

 photo Heart-Adriane_zps2e2b06dc.jpg


post signature

Tuesday, February 11, 2014

Falling For You Valentine Card


When I saw this Valentine Tree shape at Miss Kate Cuttables, I couldn't wait to make it into a card! (I also used this shape for the border!)


 photo Heart-Adriane_zps2e2b06dc.jpg


post signature

Tuesday, February 4, 2014

Snowflake Card

 I love the simple beauty of this card, with just a touch of glitter (it's hard to see in the picture, sorry!).  And now that I've finished the snowflake design, it will be easy for you to make one.  Ridiculously easy.  As always, I'd love to see what you make!

.svg file
.studio file

 photo Heart-Adriane_zps2e2b06dc.jpg

post signature

Friday, September 27, 2013

You Are My Sunshine

This is my favoritest card I've ever made.

No, I'm not three years old, just trying to impress upon you the extent of my favoriteness.


Cute, huh?  Now, imagine the sun spinning about on its track, scattering happy feelings along its way.

Oooh, oooh, oooh, let me show you the inside too!

I left it pretty simple, since the outside was not, but I did cross-stitch a bit (the holes are in my SVG, so if you don't want to do it, take them out) to add some textural interest.  I was also thinking about embossing the heart, but decided against it (okay, I ran out of time before card club ;).

I got started on the the idea when I saw this on the Silhouette blog.  SUPER CUTE, huh?


And I checked out this tutorial to figure out how it worked:


And voila!  The possibilities are endless, don't you think?

Here's the SVG of my card--if you make one, I would LOVE to see!  Send me a link in the comments or upload a picture to our Facebook Page (where you are more than welcome to hit the "Like" button ;).

Download Card


  photo Heart-Adriane_zps2e2b06dc.jpg


post signature

Thursday, July 25, 2013

Phineas and Ferb Party


We are a little bit obsessed with Phineas and Ferb at my house. I think the show is HILARIOUS and so do my kids.  We laugh at different things, but we all like to watch.  It hit me when I was trying to plan a birthday party for my almost 4-year-old that Phineas and Ferb would be a perfect theme for him.  I asked him what he thought and got an ecstatic "YES!!!!"

So we cooked up an invitation:
The inside has the party deets, and finishes the "I know what we're going to do today" phrase: Hey Ferb, I know what we're going to do...on {the date of the party}. Unfolded, Perry looks like this:


I created several printables (like this invitation) along with this party, planning to share them.  Unfortunately, Disney's copyright department makes it really difficult to get permission for these things!  So in 4-6 weeks when I find out if I can legally share them, hopefully I will be putting up links for you to download!

Friday, June 14, 2013

Father's Day is Almost Here Again!


Hi there!  I know we've promised summer fun, but I need to get my Father's Day card up here so you can print it and cut it if you'd like.

It's a simple card, perfect for all of the men in your life--they don't want anything fussy, do they?  I did allow myself a tiny bit of baker's twine and ribbon, but I tried to balance them out with some manly staples.

If you'd like to use a Silhouette:
Silhouette Card Base
Silhouette "Dad" File

If you'd like to print and use scissors:
Dad Printable PDF
Card Base PDF

 photo Heart-Adriane_zps2e2b06dc.jpg


post signature

Friday, May 10, 2013

Mom likes her roses recycled--with a side of ink, please.

It is a gift that's delicious AND practical: after she eats the candy, Mom has something cute to write with.  And these flowers will not die!  Hooray!  Plus, theoretically, it SHOULD make a pen easier to find--though mine are being used as Harry Potter wands as we speak...

I have most of this stuff lying around my house--I bought the pens, because I get a kick out of having the pen actually write in the color of the flower... (little known fact, I'm a pen fanatic--as a child, I'd blow my allowance on Gelly Roll Pens at the craft store)  but you can use any pen, as long as it will write!

Look for floral tape at any craft store with a floral section.  It's quite inexpensive, and one roll will last a good while.

You can use any kind of tape--I just couldn't find my cheap masking tape at the time we took this photo!

The skewer can be anything long and stick-like.  You could use your pen if they have a smooth shaft (mine don't).

I am using a recycled salsa jar because I love the shape.  Plus, I have a million in my craft room and the hubs won't let me save any more unless I use some of the stash!

Use double sided paper (not cardstock).  Most of my stash IS cardstock, so I ended up printing my own using digital scrapbook paper (I used paper from Zoe Pearn's "Birthday Girl" kit--pretty much my favorite in the world).  Think how cute book pages, newspapers, or magazines would be!  Really, I don't know why I don't just make flowers all day long--I'm that excited about it.

Then I cut this shape out using my Silhouette.  But never fear if you don't have one!  You can still make this project!!  There's a tutorial here that shows you how to make a template for these flowers using a coffee can.  There's a tutorial here that has a simpler one--which will make your roses turn out differently, but they are very cute and easy too!

Tuesday, April 9, 2013

It's My Party, I'll Give Stuff Away If I Want To! (Giveaway Closed)

 
Yay for birthdays.  Yay for celebrating living and loving.  Yay for giving!

I've been collecting cards for a while now, planning on giving some away.  Suddenly, my birthday rolled around, and I thought, what better time to give away cards?  Especially my latest, favoritest, "Happy Birthday" card!

So I gathered together some of my favorites, and I will send the whole pack to one lucky pickle person next week.  If you haven't already, "like" One Lucky Pickle on Facebook, and leave a comment by April 15th (in between doing taxes--yuck!).  I will choose a winner and mail the cards on the 16th!


The giveaway will include these eight cards (including the birthday one above), matching envelopes, plus a couple surprise cards, all handmade my me.  Good luck!!
 _______________________________________________________________________________

Friday, March 15, 2013

Luck of the Irish to Us!

**Please, please, please imagine my voice saying all of this in an Irish accent. Because that is how I'm writing it.**

We made a "garlic." It's a garland, really--but my kiddos can't wrap their lips around that word. So it's our "St. Patrick's Garlic."

It was fun and easy. I just cut a million shamrocks out of green paper using my Silhouette. Getting the buggers off without tearing them was really the hardest part of this project! Then the lads helped me tape them on to baker's twine (so the shamrocks keep falling off, but whatever, right?) and we tied some ribbons in between. I love that it was fast, easy, and imperfect, but it makes me smile every time I see it.

Yeah, there's pink ribbon. Sometimes, as the only lass in a house full o' lads, I just HAVE to rebel. And it matched my other ribbon, so there.

I think we may start a new tradition, where I stand under the shamrock "garlic" and my husband comes and kisses me...even though I'm not Irish ;)

Are you doing anything to decorate for and/or celebrate St. Patrick's Day?


**Okay, stop the accent now...I can't keep this up!**

Here's a sneak peak into my current project!  My fabulous neighbors nailed up some new crown molding for us!!!  Now it's our job to finish the cracks and holes, and paint 'er good!  I'm so excited!  Stay tuned for the whole story.

Friday, March 1, 2013

Reigning in the School Clutter

When my baby started Preschool, waaaay back in 2010, I was unprepared for the inundation of papers.  Worksheets, projects, art, report cards, name cards, and sweeter-than-chocolate Mother's Day cards. What's a Mommy to do?  Especially when my sweet budding scholar couldn't part with anything.

Put everything in a drawer to "sort through when he's asleep," of course! And then let it build up for approximately three years.

The best part is when he'd remember something in there and go searching for it.  School paraphernalia everywhere.  And then he and his brother would dance in it (not the baby--he just tried to eat it all).  It was time to stop the madness.

"Save me!  Someone save me!"

Monday, February 4, 2013

Monday, January 14, 2013

Time is Ticking!


I have to admit, I still geek out a little whenever I see this fabulosity on my wall!  It makes me soooo happy.

It was very easy (the hardest thing was waiting for the paint to dry long enough!), but has a huge impact.  It's nearly 2 feet in diameter!

Back in April, 2010, Real Simple Magazine had an issue with multiple covers, and one of them had this clock on it:
IMG_0810
Isn't it GORGEOUS?!?  I love the way it flows, I love the way it sits on your desk all 3D-esque.  The designer, Scott Henderson said, “The effect is a non-stop – and somewhat chaotic – interpretation of time.”  Which describes my life and sense of time so perfectly! I kept thinking about it and thinking about it.  If I could have, I would have bought it--to heck with the price tag.  But alas, I could not find it anywhere.

Next best thing?  Make my own, of course!

I decided on a wall clock. I've been wanting a nice, huge, gorgeous clock for my kitchen, but there was always something higher on the budget's priority list.
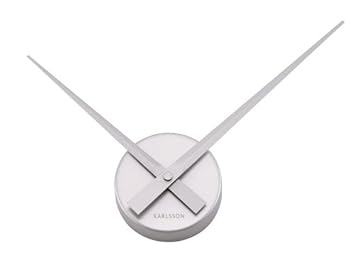
I bought the hands from Amazon.  There are a few options for clocks like this, so browse around!

I traced the clock on my computer and cut out the vinyl on my Silhouette.  Being so big, the clock is in several pieces, but I matched them as carefully as I could.  When you are at my house, feel free to look close and find all the seams.

I'm in love, I'm in love, I'm in love.  But I do need your advice.  I'm very VERY tempted to paint the hands of my clock a bright orange-y yellow, like in my inspiration. 

Roughly Photoshopped, I'm thinking like this:
See? It makes the hands pop and easier to tell what time it is! Do you like it better with just the hands painted?  Or the whole clock part? I await your advice on this very serious dilemma!

If you (like my husband--sorry dearie) don't like that it is a bit difficult to read, imagine doing a similar clock with different sizes and fonts for the numbers!  I think I'll have to do another one somewhere else because this project was SO FUN!

I am linking up at Be Different Act Normal's Show and Tell Saturday!

LinkWithin

Related Posts Plugin for WordPress, Blogger...