Monday, January 21, 2013

A Rainbow of Thanks


I am obsessed with fonts and color--as you can probably tell, looking at these cards! Designing this card was so fun, I couldn't stop with one color!

So whether you resolved to be more thoughtful (what better way than a thank you note?), or you need a pretty present (wrap them in cellophane and tie with a ribbon--LOVE!), or you haven't quite finished thanking everyone for the fabulous gifts you received at Christmas time, it's your lucky day!  I'm sharing all eight colors with you.  When combined with different paper color, you have a bajillion combination options!

They are super easy too-- click this link to download the folder, and choose Save.  Open the folder, and "Extract all files."  Choose your color and print it on a pretty paper.  If your printer doesn't print borderless, you may need to trim the edges of your paper. You will have two cards--cut the paper "hamburger style" and then fold each piece in half.  That way the words wrap all the way around onto the back of the card.  See?  Here is what the back looks like:
 

These babies look great dressed down and dressed up!  I traced some of the "thanks" with my embossing ink marker, added some clear embossing powder, and heated them up.  Chic elegance.  Imagine glitter, or ribbon, baker's twine, buttons, brads...  excuse me, I've got to go and dress up some cards!


Monday, January 14, 2013

Time is Ticking!


I have to admit, I still geek out a little whenever I see this fabulosity on my wall!  It makes me soooo happy.

It was very easy (the hardest thing was waiting for the paint to dry long enough!), but has a huge impact.  It's nearly 2 feet in diameter!

Back in April, 2010, Real Simple Magazine had an issue with multiple covers, and one of them had this clock on it:
IMG_0810
Isn't it GORGEOUS?!?  I love the way it flows, I love the way it sits on your desk all 3D-esque.  The designer, Scott Henderson said, “The effect is a non-stop – and somewhat chaotic – interpretation of time.”  Which describes my life and sense of time so perfectly! I kept thinking about it and thinking about it.  If I could have, I would have bought it--to heck with the price tag.  But alas, I could not find it anywhere.

Next best thing?  Make my own, of course!

I decided on a wall clock. I've been wanting a nice, huge, gorgeous clock for my kitchen, but there was always something higher on the budget's priority list.
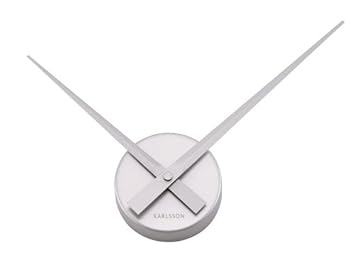
I bought the hands from Amazon.  There are a few options for clocks like this, so browse around!

I traced the clock on my computer and cut out the vinyl on my Silhouette.  Being so big, the clock is in several pieces, but I matched them as carefully as I could.  When you are at my house, feel free to look close and find all the seams.

I'm in love, I'm in love, I'm in love.  But I do need your advice.  I'm very VERY tempted to paint the hands of my clock a bright orange-y yellow, like in my inspiration. 

Roughly Photoshopped, I'm thinking like this:
See? It makes the hands pop and easier to tell what time it is! Do you like it better with just the hands painted?  Or the whole clock part? I await your advice on this very serious dilemma!

If you (like my husband--sorry dearie) don't like that it is a bit difficult to read, imagine doing a similar clock with different sizes and fonts for the numbers!  I think I'll have to do another one somewhere else because this project was SO FUN!

I am linking up at Be Different Act Normal's Show and Tell Saturday!

Tuesday, January 8, 2013

On the Last Day of Christmas My Parents Gave To Me...

...A million hours of sa-ah-anding. I know, "sanding" does not have enough syllables to work with that song, but you are just going to have to live with it. I have too much sawdust in my brain to think of anything better!

We made blocks for our kids for Christmas! Inspired by block sets at The Land of Nod,  my husband and I set out to see if we could make our own set for a "fun project" (my priority) and "less money" (his priority).

It turned out to be waaay less money, and in retrospect, was pretty fun.  Though my husband still hasn't recovered from all those nights sanding these suckers!  Someday, he will look back with fondness.  Maybe.

Friday, December 7, 2012

Day 4: Hot Chocolate Bar


Our advent activity on Tuesday was a hot chocolate bar!  Yummy nummy nummy!  

It doesn't take a lot to get my kids excited, so our mix-ins were pretty simple.  Besides, I knew they would want to have EVERY SINGLE ONE in their chocolate and I didn't want the flavor combinations to turn nasty!

Extra points for you if you can tell me where the quote on my mug comes from!  Here's a view of the back so you can see the whole quote:


Aw.  My sweet Mr. Darcy husband had this made for me after I showed him a similar one on Pinterest.  Ladies, if you share my love of Pride and Prejudice, might I suggest some subtle (or not-so-subtle) hints?   Print it out and put it on your wall...e-mail the picture to your honey...create one yourself and tell him that you've got his Christmas present to you covered... (does anyone else ever buy their own presents?)

Wait.  We were talking about chocolate, right?  It's hard to stay focused on two of my favorite topics at the same time!  What else would you stir into hot chocolate?  Do you have a favorite schmancy kind?  I'm in the market for a "Mommy only" variety!

Monday, December 3, 2012

Great Minds Think Alike!

I was in the process of writing this post when Adriane's latest post popped up, with wonderfully detailed instructions on how to make an adorable Christmas Advent Calendar... AH! She beat me to it! I honestly debated whether or not to post this because let's be honest- Adriane's advent calendar is awesome... and mine is sort of the slacker version of hers. But then I decided that I'm going to embrace my inner slacker, and that perhaps there are other slackers like me out there who want to make something cute and festive to help their family count down the days until Christmas but lack patience and creativity to do much. So here we go!

This year it was time to retire our old advent calendar- a darling mini-stocking garland that hung in our bay window- simply because it no longer matched anything in our home. I was on the look-out for something that was bright and cheery, and wouldn't take up a lot of space. After a bit of research I landed on this:

Saturday, December 1, 2012

Christmas Advent

I hope that everyone had a fantastic Thanksgiving!  Now it's time to get busy getting ready for the next holiday!  If you are like me, trying to get traditions started and set the tone for Christmases to come, that preparation can be a little intimidating.  (And if you aren't--please comment: What has been your favorite Christmas tradition?!?)

I am excited about this tradition which we will be starting this year--our Christmas Advent Calendar!  This will be the third year I've been tweaking this project (sorry to those of my friends who have seen this already).  I would love to share some tips and warnings so that if you decide to try this out it might go more smoothly.

Wednesday, November 14, 2012

Oh Christmas Tree Oh Christmas Tree!

We're jumping from incredible Halloween costumes to Christmas decorations here at One Lucky Pickle today! Christmas is my absolute favorite time of the year. In fact, I'm pretty much giddy from the week before Thanksgiving clear until New Year's Day. What can I say? I LIVE for this time of year! 

As I was putting away the Halloween decorations last week I started going through the scary towers of boxes in our attic and I soon realized that I was in a serious pickle! None of my Christmas stuff matches our newly remodeled home! In fact it all CLASHES... like bad. Like wearing socks with sandals bad. I presented this pickle to my husband who quickly insisted that it wasn't much of a pickle. After a long conversation about whether or not my pregnancy insanity has completely taken over we finally came up with a compromise- I could sell some of our old decorations, and whatever money I end up  making is how much I have to spend on giving our Christmas decorations a little make-over. 
DEAL! 

I love to set up my Christmas decorations the day after Thanksgiving, so the clock is ticking! I was able to sell a few of our older Christmas items and now I get to spend my evenings crafting. Some of my old things were easily updated with a new coat of paint and new vinyl letters, others needed some modge podge and hefty dose of my husband's worst nightmare- GLITTER! (Living in a house full of girly girls has got to be rough... poor guy. I promise to buy him something manly for being such a good sport.) My favorite new addition has got to be these darling little Christmas trees.


I was trying my best to be thrifty and crafty, so instead of buying styrofoam cones to cover I decided to make my own out of recycled cereal boxes. No joke! I  keep looking at the finished product thinking, wow... you used to be filled with cheerios. Amazing. And it's so easy! 

1- Unfold your box and roll it into a cone. 
2- Staple or tape it in to place and cut it to be the height you want.
3- Bust out some trimmings and your hot glue gun and start decorating!

That's it! I did end up covering mine with felt before I added any decorations just because I didn't want to risk any cardboard showing through, but that's probably an optional step. 

I have big plans for making a whole little Christmas tree forest for our mantle, and some of them are turning out way cuter than these ones did... but I know that if I wait to do this post until they are all done it won't happen. So let me introduce you to the trees I have finished.

The "Muppet" Tree
Seriously, doesn't this remind you of everyone's favorite little red monster from Sesame Street? It's just some fuzzy yarn I picked up on sale at Hobby Lobby for about $2. I only used about half of it. 

The Tinsel Tree
I just used some tinsel I had in my attic for this one. My girls love this one because it "Parkles". (Sparkles)

And The Ruffle Tree

For this one I just used a little ruffle trim I found at Walmart for $2.50. I should have made this one a smaller tree because I actually ended up running out of ribbon and having to go get more. bummer. Oh well- we love ruffles at our house, even more than we we love glitter! 

The possibilities are truly endless here! I honestly laid in bed last night dreaming of cute trimmings I could use to make more trees. I'm thinking feathers, buttons, felt, little silk flowers, and of course... glitter. :)  I love that this project is totally adaptable. You can make your trees to match your style and your decor. I think a whole forest of trees in shades of ivory, white, and gold would be gorgeous. 

Give it a try and let me know what you think! In fact I'd love to see pictures of what you come up with because I'm sure they'll be cuter than what I did! Post them on our Facebook page so we can all admire your work!


LinkWithin

Related Posts Plugin for WordPress, Blogger...