Tuesday, February 26, 2013

It's the Little Things


Little things like tulips in a jug on an entryway shelf. Sitting next to my pretend family that came with my new frame.  Hello to you, happy looking family!  My sweet son asked me what their names were, and my husband told him--named every model in every frame that I bought yesterday. I wish I could remember so I could introduce you.

Add that to my to-do list: get pictures printed for my new frames.

But really, when you have something so exciting, who can wait to fill the frame before it goes up?

I don't do patience well.

But it's the tulips that make me giddy.  They aren't even real--I grabbed them at Michael's yesterday for 2.50 a bunch (there are two bunches there).  When combined with that glorious jug I grabbed at Joann's forever ago (for less than $10, I believe), those babies sing. And I won't ever have to mourn their death! I love real looking pretend flowers.

Am I allowed to plant them in my yard?

Tuesday, February 19, 2013

Playing with a Puddle of Goo

It's nothin' new. 

It's an oldy and goodie.

It's cornstarch n' water (with a little color thrown in).  But it sure made my kiddos happy for twenty minutes this afternoon!  And for anyone who knows my kids, that's a looooong time!

It all started with my kindergartener's take home reader: a book called Making Ooze Monsters.   Naturally, it was a big hit.  I loved playing with cornstarch gloop when I was a kid (okay, fine.  Still do!), so we pulled out all of our ingredients:

Do you like how my picture turned out all "I'm from a seventies TV show" so I kind of tweaked it more in that direction?  I thought you might.

Add 2-3 drops of food coloring to 1/2 cup water.  Mix into 1cup cornstarch.  If your mixture needs more water, add a little.  We had to play with the consistency--the book suggested 2/3 cup but it was too runny.  Then I added too much cornstarch...

Finally it was just right:
 My boys were seriously happy about being allowed to get messy.  Getting to mix the food coloring into the water though?  YEAH BUDDY. 

I liked that I wasn't super worried when the baby came to check out the huge glob of goo that mysteriously ended up in the corner.  "I don't know Mom, I kept my hands over the table the WHOLE TIME!"  It's just cornstarch and water...it won't kill him before I wash off my hands...


In the end, we turned our gloop into monsters, like the book suggested, using buttons for eyes.  Yes, the mouths are due to my mad computer skillz--the buttons looked lonely.


It was a mess--think this picture multiplied all over the floor, their hands, and clothes.  But it cleans up so super easy!  I tell myself that it's really good for my kids to get messy.  And when it's an easy to clean mess, it makes all of us happy!

Tuesday, February 5, 2013

Valentine's Day Tea Party

Once upon a time there was a 5 year old girl with pretty blonde hair and big blue eyes. We will call her Princess Strawberry. Why? Because I just asked her what she wanted her pretend name to be, and that's what she said. :)

About a week after Thanksgiving Princess Strawberry decided her greatest wish in the whole wide world was to throw a tea party for her friends. She immediately started making long detailed lists of what kinds of treats she wanted to serve, and what sort of activities her tea party would include. Her mother- who was slightly overwhelmed with the hustle and bustle of the holiday season, not to mention exhausted from being great with child and chasing 3 little princesses around all day- gently explained to Princess Strawberry that while she thought it was very sweet that she wanted to throw her friends a tea party, that perhaps they could wait until life slowed down a little. 
"When would that be?" asked the young princesses.
 Ha- Never. "Uhh... maybe after the holiday season is over" Her mother finally replied, "Maybe we could do it in February, for Valentine's Day." 
The princesses was ecstatic! A Valentine's Day Tea Party! What could be more delightful than that?! 

Like I said earlier, the princess's mother was pretty tired! This pregnancy had not been an easy one for her, and secretly in her heart she hoped that her darling princess would forget all about this tea party business... But she should have known better. Christmas Day as the girls were being tucked into bed Princess Strawberry asked her mom, "How many more days until Valentine's Day?" 

And thus the Valentine's Day Tea Party was born. 


By now you all know that I love any excuse to throw a party! I really do! But I needed this one to be SIMPLE- and it was. It was also extremely fun! I love Valentine's Day, and I love the idea of celebrating ALL the people you cherish in your life, in addition to your cute hubby. (He's pretty darn important too!) I hope as you check out these pictures you'll be able to snag some ideas on how to throw a very simple Valentine's Party for the little princesses (and princes!) in your life!
 In order to keep things simple, most of the treats we served were store bought. At first I was kind of embarrassed about that, but guess what- the kids didn't care AND I got to keep my sanity!


Here's a list of what I bought:

Pink coconut "snowballs"
Cinnamon hearts
Cherry gummy hearts
Dove Strawberry and Chocolate swirled hearts (These looked AND tasted awesome!)
Raspberries and Strawberries which were cut to looked like hearts.
Strawberry Nestle-Quick
I also bought pre-sliced cheese and used a cookie cutter to cut out some cute heart shapes to go with our crackers.


And the few things I baked:
(Mostly because I wanted the grown ups to be able to enjoy a little something to eat too!)
Turkey and cheese roll-ups in whole wheat tortillas
I also used some store bought puff pastry and made little pesto ham and cheese bites, and Nutella and strawberry pies- heart shaped of course.

Then my sister in law surprised me by making her famous raspberry banana bread cupcakes with raspberry cream cheese frosting- and I ate about 6 of them. :)
After we ate the girls played dress up, got manicures and fancy glittery hair-dos, and made candy necklaces. 
 I'm so glad my little princess suggested throwing this party! We all had so much fun, and I loved spending some quality time with all my favorite little girls. 

Monday, February 4, 2013

Monday, January 21, 2013

A Rainbow of Thanks


I am obsessed with fonts and color--as you can probably tell, looking at these cards! Designing this card was so fun, I couldn't stop with one color!

So whether you resolved to be more thoughtful (what better way than a thank you note?), or you need a pretty present (wrap them in cellophane and tie with a ribbon--LOVE!), or you haven't quite finished thanking everyone for the fabulous gifts you received at Christmas time, it's your lucky day!  I'm sharing all eight colors with you.  When combined with different paper color, you have a bajillion combination options!

They are super easy too-- click this link to download the folder, and choose Save.  Open the folder, and "Extract all files."  Choose your color and print it on a pretty paper.  If your printer doesn't print borderless, you may need to trim the edges of your paper. You will have two cards--cut the paper "hamburger style" and then fold each piece in half.  That way the words wrap all the way around onto the back of the card.  See?  Here is what the back looks like:
 

These babies look great dressed down and dressed up!  I traced some of the "thanks" with my embossing ink marker, added some clear embossing powder, and heated them up.  Chic elegance.  Imagine glitter, or ribbon, baker's twine, buttons, brads...  excuse me, I've got to go and dress up some cards!


Monday, January 14, 2013

Time is Ticking!


I have to admit, I still geek out a little whenever I see this fabulosity on my wall!  It makes me soooo happy.

It was very easy (the hardest thing was waiting for the paint to dry long enough!), but has a huge impact.  It's nearly 2 feet in diameter!

Back in April, 2010, Real Simple Magazine had an issue with multiple covers, and one of them had this clock on it:
IMG_0810
Isn't it GORGEOUS?!?  I love the way it flows, I love the way it sits on your desk all 3D-esque.  The designer, Scott Henderson said, “The effect is a non-stop – and somewhat chaotic – interpretation of time.”  Which describes my life and sense of time so perfectly! I kept thinking about it and thinking about it.  If I could have, I would have bought it--to heck with the price tag.  But alas, I could not find it anywhere.

Next best thing?  Make my own, of course!

I decided on a wall clock. I've been wanting a nice, huge, gorgeous clock for my kitchen, but there was always something higher on the budget's priority list.
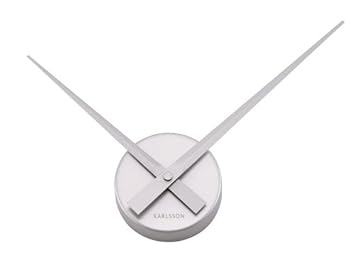
I bought the hands from Amazon.  There are a few options for clocks like this, so browse around!

I traced the clock on my computer and cut out the vinyl on my Silhouette.  Being so big, the clock is in several pieces, but I matched them as carefully as I could.  When you are at my house, feel free to look close and find all the seams.

I'm in love, I'm in love, I'm in love.  But I do need your advice.  I'm very VERY tempted to paint the hands of my clock a bright orange-y yellow, like in my inspiration. 

Roughly Photoshopped, I'm thinking like this:
See? It makes the hands pop and easier to tell what time it is! Do you like it better with just the hands painted?  Or the whole clock part? I await your advice on this very serious dilemma!

If you (like my husband--sorry dearie) don't like that it is a bit difficult to read, imagine doing a similar clock with different sizes and fonts for the numbers!  I think I'll have to do another one somewhere else because this project was SO FUN!

I am linking up at Be Different Act Normal's Show and Tell Saturday!

Tuesday, January 8, 2013

On the Last Day of Christmas My Parents Gave To Me...

...A million hours of sa-ah-anding. I know, "sanding" does not have enough syllables to work with that song, but you are just going to have to live with it. I have too much sawdust in my brain to think of anything better!

We made blocks for our kids for Christmas! Inspired by block sets at The Land of Nod,  my husband and I set out to see if we could make our own set for a "fun project" (my priority) and "less money" (his priority).

It turned out to be waaay less money, and in retrospect, was pretty fun.  Though my husband still hasn't recovered from all those nights sanding these suckers!  Someday, he will look back with fondness.  Maybe.

LinkWithin

Related Posts Plugin for WordPress, Blogger...